Making dessert has never been as easy as the Scout Elves’ six no-bake recipes that can be made in a snap! Put away the bakeware, and mix your way to perfect desserts thanks to these lightning quick tips from the Scout Elves. Before you know it, your family will be enjoying these easy, after dinner sweets or satisfying their sweet tooth cravings with these speedy, no-bake desserts.
Tasty Truffles
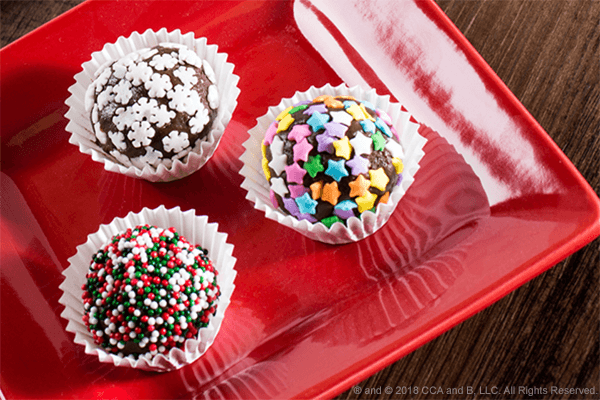
Tasty Truffles
Makes 15–30 truffles
You’ll Need:
- 1 can condensed milk
- ¼ cup cocoa powder
- 2 tbsp. salted butter
- 1 tbsp. vanilla extract
- Tall microwave-safe bowl
- Flat-bottomed dish
- Whisk
- Sprinkles (or any other toppings of your choosing)
- Candy wrappers
Instructions:
- In a tall microwave-safe bowl, WHISK together the condensed milk and cocoa powder.
- CUT the butter into small chunks, and put them in the bowl.
- MICROWAVE for 3 minutes.
- STIR the mixture with a whisk until it is smooth.
- MICROWAVE for an additional 3 minutes.
- REMOVE the bowl from the microwave, and whisk in the vanilla extract.
- Evenly SPREAD the mixture in a flat-bottomed dish.
- REFRIGERATE for 2 hours.
- REMOVE the mixture from the fridge, and using lightly greased hands, roll 1½ teaspoons of the mix into a ball. Repeat.
- ROLL each truffle through the toppings of your choice, and then, roll them in candy wrappers.
- ENJOY!
Peach Berry Smoothie
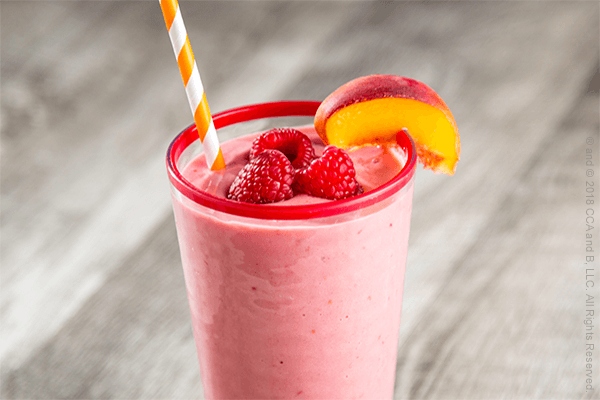
Peach Berry Smoothie
Makes 1 smoothie (approx. 12 oz.)
You’ll Need:
- 1 cup sliced peaches
- 1/2 cup frozen raspberries
- 1 cup vanilla almond milk
- 1-2 tsp. honey
- 3-4 ice cubes
- 12 oz. cup
- Blender
Instructions:
- COMBINE all ingredients, and blend until smooth. Helpful hint: Vanilla almond milk will add to the sweetness of your smoothie, but you can use any milk you prefer. Add more ice or milk to the recipe if you prefer a runnier smoothie.
- TAKE a big sip of your berry delicious treat!
Cheesecake Cups
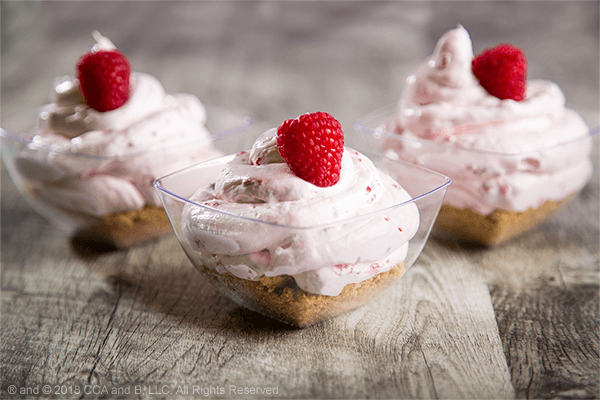
Raspberry Cheesecake Cups
Makes 6 mini cheesecake cups
You’ll Need:
Crust
- ¾ cup graham cracker crumbs
- 1 tbsp. sugar
- 3 tbsp. unsalted butter, melted
Filling
- 2/3 cup sugar
- Cream cheese (8 oz.)
- 2 tsp. lemon juice
- 1 tsp. vanilla extract
- Tub of frozen whipped topping, thawed (8 oz.)
- 1 cup raspberries
Other
- Bowl
- Electric mixer
- 6 small serving bowls
- Spoon or spatula
Instructions:
- In a bowl, STIR together the graham cracker crumbs, sugar and butter to make the crust.
- DIVIDE the crust evenly among six small bowls, and press it firmly into the bottom of the dish.
- In another bowl, MIX together the sugar and cream cheese until smooth.
- ADD in the lemon juice and vanilla extra, mixing to combine.
- FOLD in the whipped topping with a spoon or spatula.
- STIR in the raspberries.
- DIVIDE the cheesecake among your six bowls evenly, and combine raspberries on top as a garnish.
- REFRIGERATE for at least an hour before enjoying!
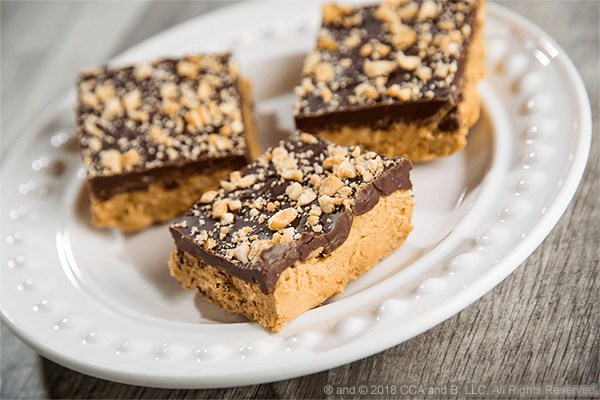
Peanut Butter Bars
Chocolate Peanut Butter Bars
Makes approximately 12 bars
You’ll Need:
- ½ cup (1 stick) butter
- 1 cup + 2 tbsp. creamy peanut butter (keep separated)
- 1 cup graham cracker crumbs
- 1 cup powdered sugar
- 1 cup chocolate chips
- Pan (approximately 8”x8” or 9”x9”)
- ½ cup chopped peanuts
- Aluminum foil
- Electric mixer
- Bowls
Instructions:
- LINE an 8″x8″ or 9″x9″ pan with aluminum foil, and set it to the side.
- PLACE the butter in a bowl, and microwave for 1 minute or until the butter is melted.
- ADD 1 cup of peanut butter, graham cracker crumbs and powdered sugar, and stir until combined.
- SPREAD the mixture evenly throughout the aluminum foil–lined pan, and place it in the refrigerator.
- PLACE2 tbsp. of peanut butter and chocolate chips in a bowl, and microwave in 30 second increments, stirring after each heating until smooth.
- SPREAD the chocolate over the top of the peanut butter layer.
- SPRINKLE the peanuts on top of the chocolate evenly.
- PLACE back in the refrigerator, and chill until firm (approximately 1 hour).
- ENJOY!
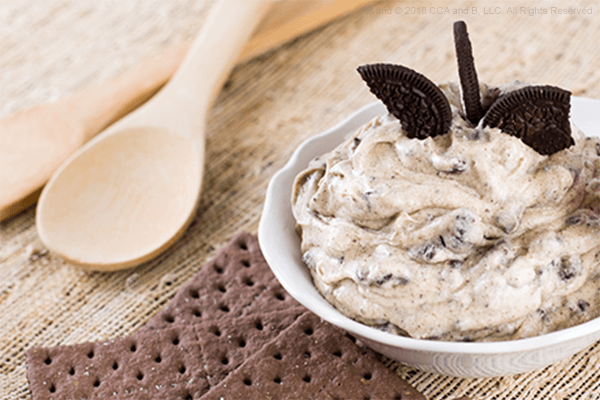
Cookies & Cream Dip
Cookies & Cream Dream Dip
Makes approximately 10–12 servings
You’ll Need:
- 1 8 oz. package of whipped cream cheese
- ½ cup butter
- 1 cup whipped cream
- 1 cup powdered sugar
- 2 tbsp. brown sugar
- 1 tsp. vanilla extract
- 8–12 chocolate sandwich cookies
- Bowl
- Zipper storage bag
- Whisk
- Spatula
- Cookies, crackers or fruit to dip
Instructions:
- Using a whisk, BEAT the butter and cream cheese together until fluffy.
- ADD in the whipped cream, brown sugar, powdered sugar and vanilla extract, and beat it with the whisk until smooth.
- PLACE ten chocolate sandwich cookies in a plastic zipper storage bag, and beat them into fine pieces with your hands.
- Using a spatula, FOLD the crushed chocolate sandwich cookies into the mixture.
- GARNISH the dip with the remaining cookies, and dig right in!

Cocoa Cup Cake
Cocoa Cup Cake
Makes one cup cake
You’ll Need:
- 3 tbsp. flour
- 3 tbsp. sugar
- 1 tbsp. cocoa powder
- 1 tbsp. hot cocoa mix
- ¼ tsp. baking powder
- Pinch of salt
- 3 tbsp. milk
- 3 tbsp. vegetable oil
- Splash of vanilla extract
- 3 tbsp. chocolate chips
- Mini marshmallows
- Whipped cream
- 12 oz. mug
Instructions:
- In a microwave safe mug, MIX together all dry ingredients.
- ADD in each liquid ingredient, one by one, and whisk the mixture with a fork until the batter is smooth.
- STIR in chocolate chips.
- MICROWAVE for 90 seconds (until a tooth pick inserted in the cake comes out clean).
- GARNISH with marshmallows and whipped cream, and enjoy!
Looking for more delicious treats? Get more sweet treat recipes from Mrs. Claus!
These recipes may contain ingredients that can cause allergic reactions in certain individuals. Before using our recipes, always check the ingredient list and food labels of all ingredients and be sure to seek advice from a qualified physician if needed.